How to Edit Your Sky in Lightroom
A flat, colorless sky can pull the life out of an otherwise beautiful image. The good news is that Lightroom gives you a precise way to target just that part of the frame without touching the rest of your composition. That tool is the Sky Selection Mask, and once you understand how it works, you can transform a dull backdrop into something dramatic, moody, or downright magical.
Image by Matt Pocknell Photography
Edited with Quest 27 Serenus and Sky Recover from Quest 29 Altitude
How Sky Selection Masks Work
Lightroom's Sky Selection tool uses automatic detection to identify the sky in your image and generate a mask around it. Instead of manually brushing or drawing a gradient over the horizon, you let Lightroom do the heavy lifting: it analyzes tonal and structural differences to separate the sky from the foreground, buildings, trees, and subjects. Once that mask is created, any edits you apply, color grading, exposure changes, contrast, texture, or glow, are contained entirely within the sky itself.
This is what makes sky masking so useful. You get full creative control over one of the most visually dominant parts of a photograph without worrying about spillover onto your subject's skin tones, clothing, or the surrounding landscape. It’s not always perfect, but the masks can be refined in the Masking panel using brushes or object selection to remove or add to masks that aren’t quite right.
Sky Selection Masks are especially good for:
Rescuing a disappointing sky - Overcast days or weak sunsets can leave clients underwhelmed, even when the rest of the image is strong.
Adding drama or mood -A darker, more textured sky can add gravity and atmosphere to a scene.
Creating a focal point - A glowing sun or warm gradient draws the eye and adds depth.
Balancing a busy sky - Sometimes the sky is too eye-catching, and a mask lets you tone it down so it supports the subject instead of competing with it.
Rescuing the sky when raising overall exposure in an image - Correct your exposure for the full image, then add a mask to fine-tune the exposure just for the sky in your image, as seen in the example below.
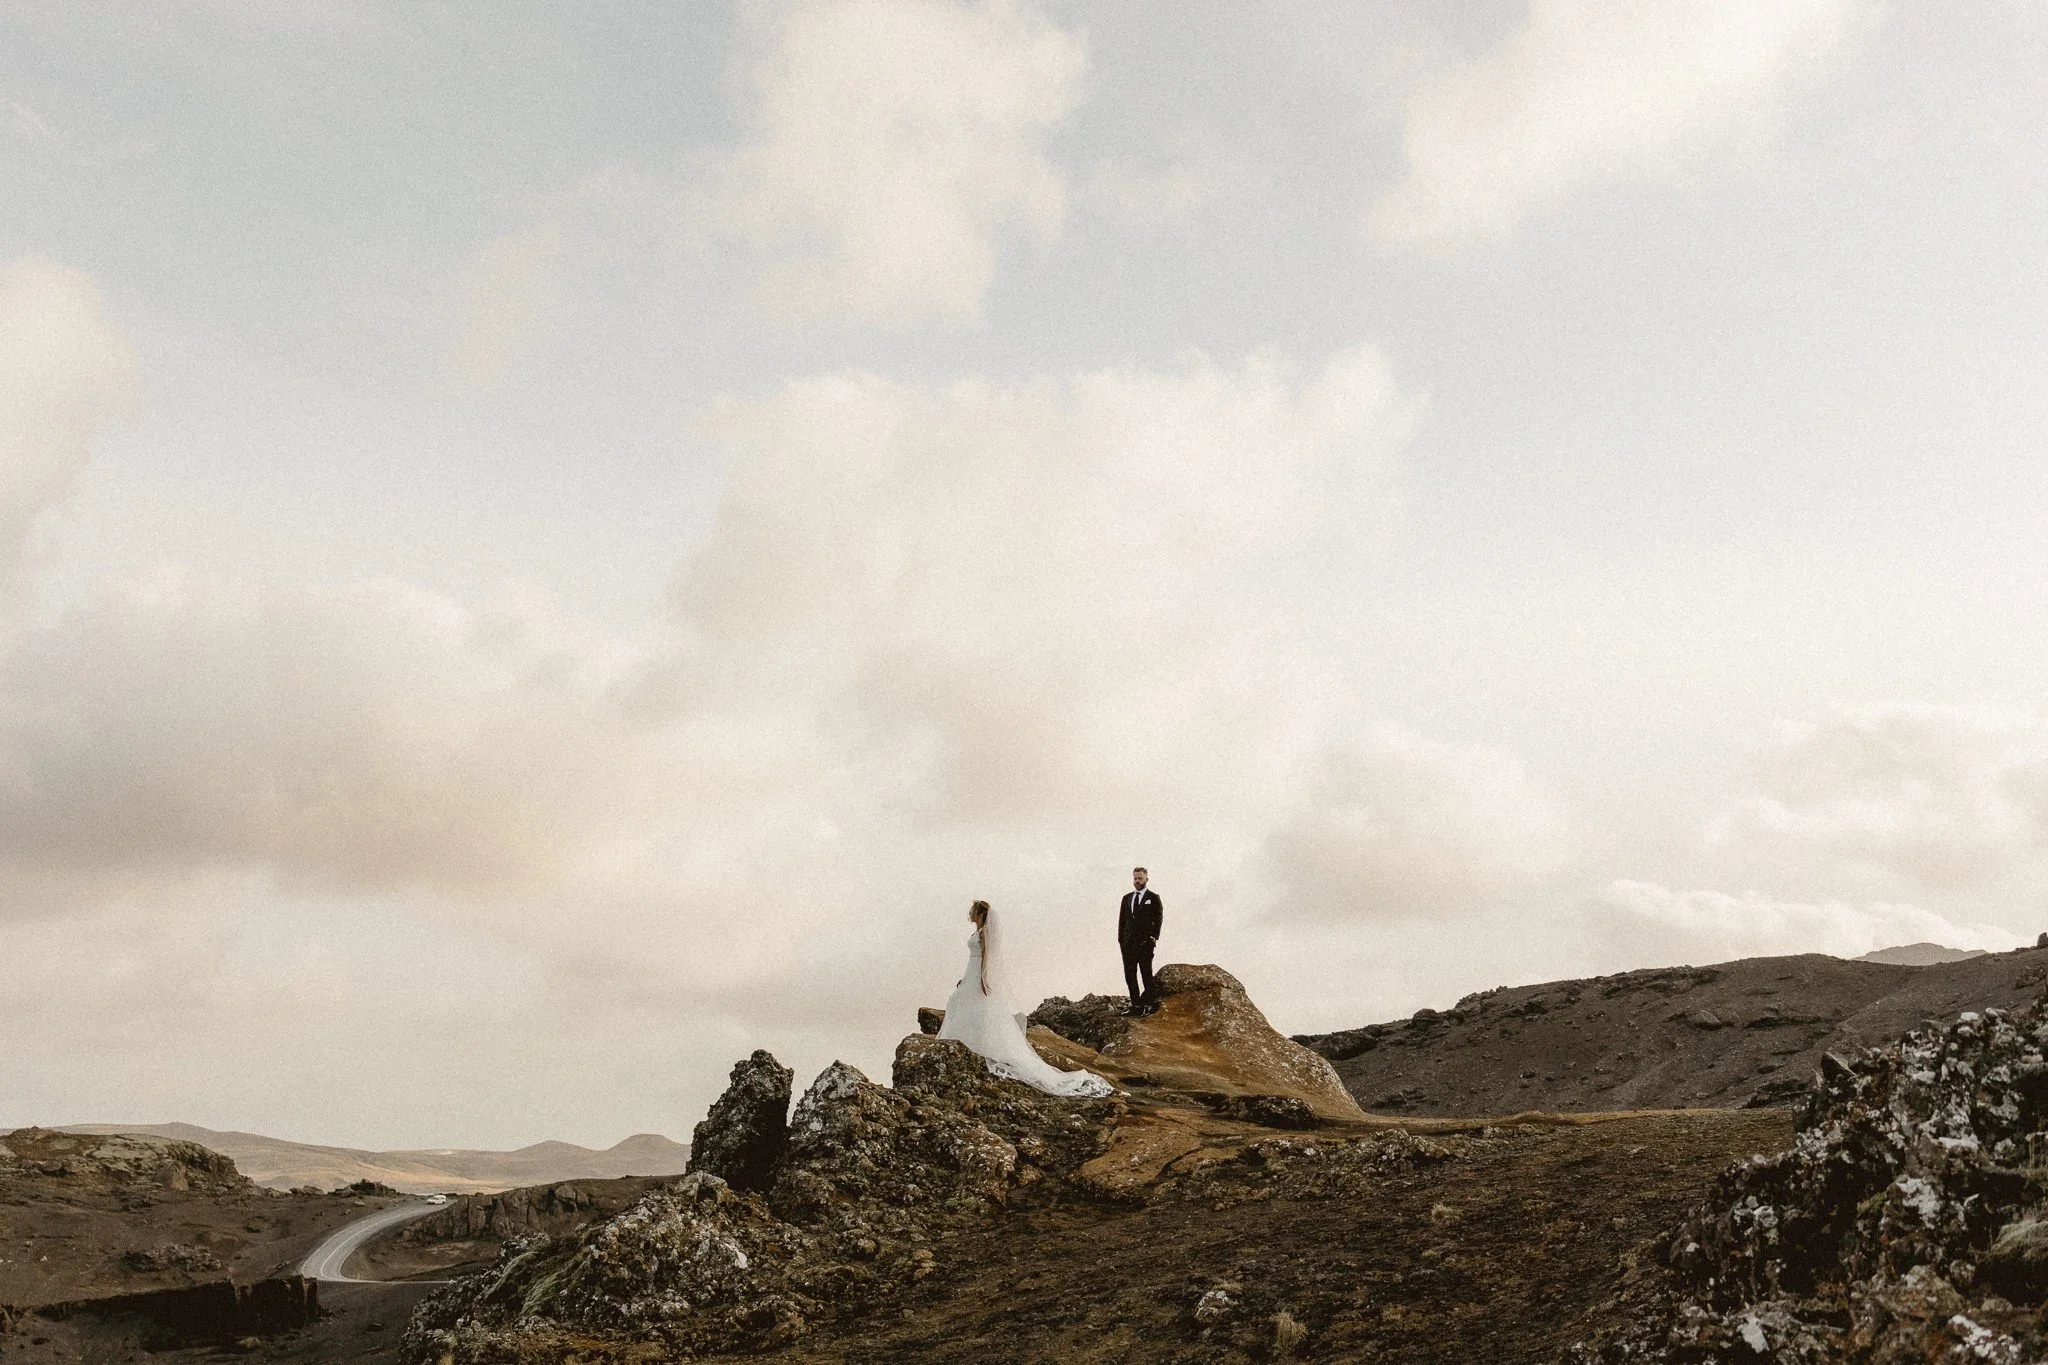
Image by Bettina Vass Photography
Edited with Quest 61 Ombra
Click to Enlarge
Image by Bettina Vass Photography
Edited with Quest 61 Ombra and a Sky Selection Mask for Exposure
Click to Enlarge
How to Find Sky Selection in Lightroom Classic
Select Sky in the Masking Panel in Lightroom Classic
Before applying any of the tools we’ll go over below, it helps to know where Sky Selection actually lives in Lightroom Classic and how to trigger it yourself.
Open the Masking panel - With your image open in the Develop module, click the Masking icon in the right-hand panel (it looks like a circle made of dots), or press the "M" key.
Select "Sky" - In the masking panel, click "Select Sky." Lightroom will automatically analyze the image and generate a mask over everything it identifies as sky.
Check the mask overlay -Toggle the mask overlay (press "O") to see exactly what's been selected in red. This lets you confirm the sky is cleanly separated from trees, buildings, or other elements before you start editing.
Refine if needed - If the automatic selection catches something it shouldn't, or misses part of the sky, use the Add and Subtract brush options within the same mask to clean up the edges.
Apply your adjustments - Once the mask looks accurate, use the sliders below it, exposure, color, texture, and so on, to edit the sky directly. Any changes stay contained inside the mask.
Layer multiple masks if desired - You can create more than one Sky mask, or combine a Sky mask with a Luminance Range or Radial mask, to build more complex effects like the sun and glow combinations described later in this article.
Showing the Select Sky Mask Overlay
Image by Baptiste Hauville
Edited with Quest 61 Ombra
Click to Enlarge
Image by Baptiste Hauville
Edited with Quest 61 Ombra and a Sky Selection Mask for Exposure and Temperature
Click to Enlarge
This same process is what powers the presets and toolsets covered below. Many of them are simply pre-built Sky Selection masks paired with carefully dialed-in adjustments, so understanding the manual steps makes it easier to tweak any preset to fit your image.
With that foundation in place, let’s take a look at the specific tools you can use to put sky masking into practice.
Sunset Enhancer: Building Warmth and Glow
Image by Cat Ekkelboom-White
Edited with Quest 59 Veralux
Click to Enlarge
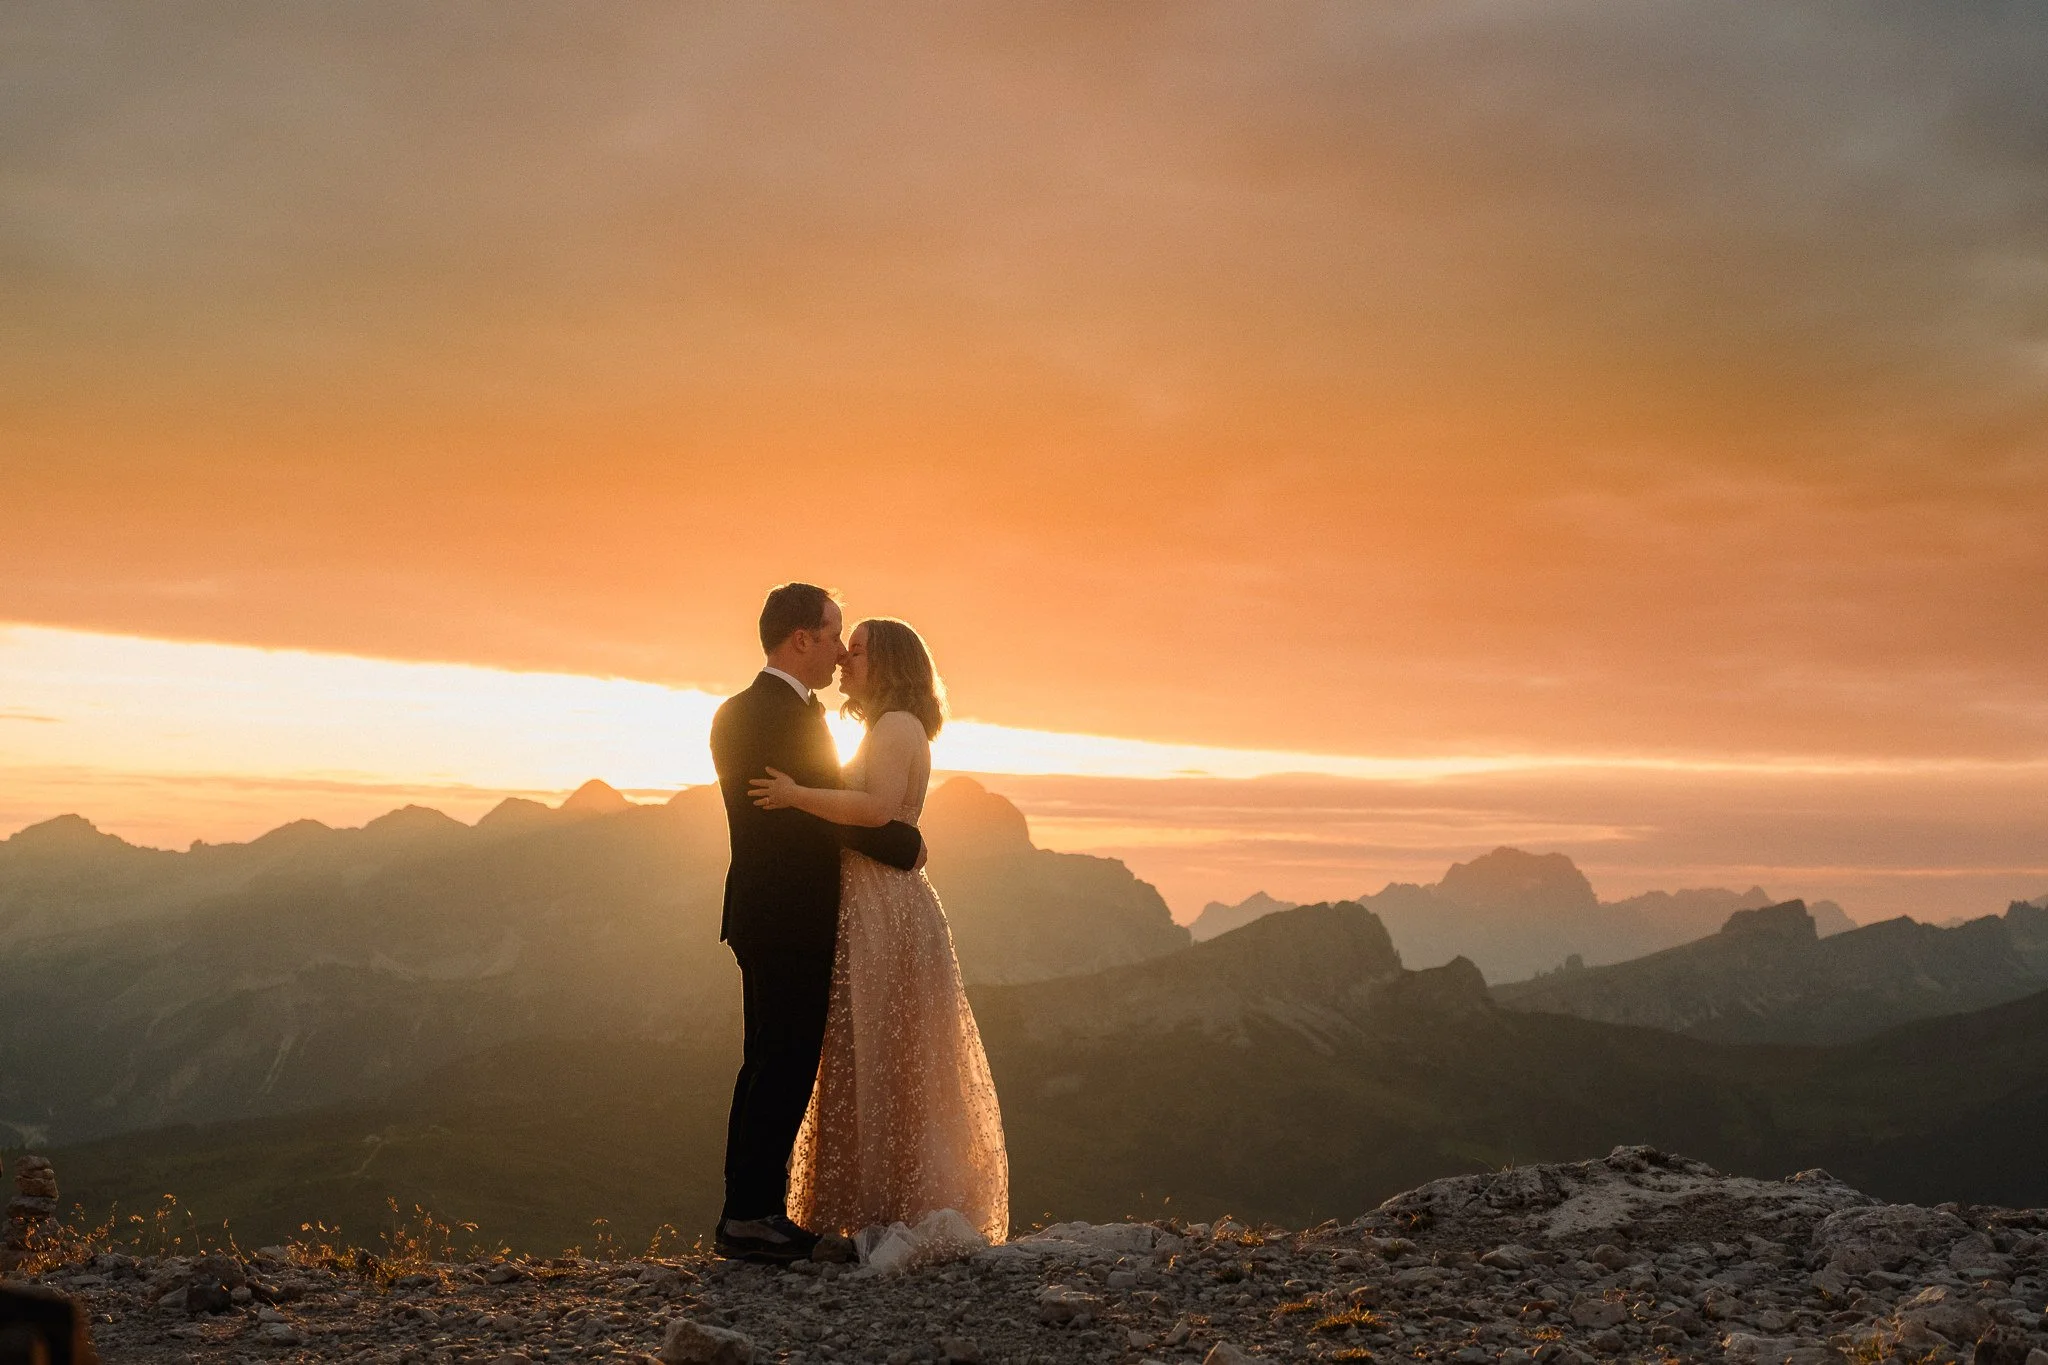
Image by Cat Ekkelboom-White
Edited with Quest 59 Veralux and Quest Tools 09 - Sunset Enhancer
Click to Enlarge
Quest Tools 09 - Sunset Enhancer is designed for exactly the scenario described above: a session where the sunset never quite delivered, or didn't show up at all. Built on Sky Selection masking, the toolset adds warm, dreamsicle-toned gradients to bring golden hour color into a frame that may not have had it naturally.
The base tool comes in three variations depending on where the horizon sits in your image: low, mid-frame, or high. Each one applies warm gradient tones that can be pushed further with the preset slider for a bold, saturated effect, or pulled back for something more subtle and natural-looking.
Beyond the base gradient, the toolset includes several supporting pieces:
Sun adds a glowing sun to the sky, with size and placement adjustable in the masking panel. Horizontal and vertical variants are included.
Bloom Sky adds a soft, blooming glow, ideal when layered over the sun to add atmosphere.
Bloom Foreground extends that same glowing effect into the foreground of the image.
Bloom Foreground - Subject applies the same foreground glow while masking out the subject, so the effect wraps around them rather than washing them out.
Cloud Texture darkens and adds definition to clouds for a more dramatic, textured sky.
Together, these tools let you build a sunset from the ground up, or simply enhance one that was already there but needed a little more presence.
Image by Baptiste Hauville
Edited with Quest 59 Veralux
Click to Enlarge
Image by Baptiste Hauville
Edited with Quest 59 Veralux and Quest Tools 09 - Sunset Enhancer
Click to Enlarge
Dark & Moody Skies
Not every image calls for warmth. The Sky - Dark & Moody tool from Fable (Quest 25) uses sky selection to push in the opposite direction, introducing stormy grays and reduced saturation for a heavier, more atmospheric look. It's a strong choice when the goal is mood rather than brightness, or when a slightly overcast sky actually works in the image's favor once it's desaturated and deepened.
Image by Matt Pocknell Photography
Edited with Quest 25 Fable
Click to Enlarge
Image by Matt Pocknell Photography
Edited with Quest 25 Fable and Sky - Dark & Moody
Click to Enlarge
Recovering and Diffusing the Sky
Altitude Presets (Quest 29) offers two tools that approach the sky from very different angles.
Sky Recover uses sky selection to reclaim lost detail and exposure, making it a reliable go-to whenever the sky has blown out or lost definition. It works well in nearly any scenario where the sky needs to be pulled back into balance.
Stratus, on the other hand, adds a soft white glow to the highlights, similar to sunlight breaking through clouds. It's worth noting that Stratus relies on a Luminance Range mask rather than Sky Selection, but the result still serves the same overall goal: giving you control over how much attention the sky commands. When the sky is stealing focus from your subject, Stratus can soften it so it recedes into a supporting role instead of becoming the main character of the image.

Image by Baptiste Hauville
Edited with Quest 27 Serenus
Click to Enlarge

Image by Baptiste Hauville
Edited with Quest 27 Serenus and Sky Recover from Quest 29 Altitude
Click to Enlarge

Image by Baptiste Hauville
Edited with Quest 27 Serenus and Stratus from Quest 29 Altitude
Click to Enlarge
Adding Sunlight Without Sky Selection
Not every sky tool relies on Sky Selection masking, and ZIA Presets (Quest 26) is a good example. This toolset skips the automatic sky mask entirely but still lets you add a glowing sun using the Sun and Burst options.
Sun (available in horizontal and vertical versions) emulates a setting sun within the scene.
Burst 01 offers a subtle, understated sun burst that adds a touch of drama.
Burst 02 is a bolder variant, with pronounced rays extending outward for a more striking effect.
These tools are useful for enhancing sunlight that's already present in an image, or introducing it where it wasn't there at all. As with the other toolsets, the preset and mask amount sliders let you fine-tune the intensity so the effect feels as natural or as bold as the image calls for.
Image by Aimee Laoise Photography
Edited with Quest 26 ZIA
Click to Enlarge
Image by Aimee Laoise Photography
Edited with Quest 26 ZIA and Sun V + Burst V 02
Click to Enlarge
Bonus: Adding a Moon and Stars Step by Step Edit
Sky editing doesn't stop at daytime enhancements. With the right combination of tools, you can turn a daylight image into something that reads as twilight or nighttime.
Start with an edit that already resembles the beginning of twilight, in this case that was achieved using Ombra 01 and Polar Twilight from Llŷr.
Add Sun V from Quest Tools 09 - Sunset Enhancer
In the masking panel, reduce the color saturation so the glowing sun reads more like a moon
Next, add Cloud Texture from the same toolset for extra atmosphere
From there, bring in Fireflies 2 from Driftwood (Quest 39), reducing intensity with the preset or mask slider and desaturating the color so it resembles scattered stars rather than glowing fireflies.
Finally, use the Subtract Brush to clean up any Fireflies spots that look out of place, such as points that overlap the clouds.
The result is a quiet, poetic sky with a moon and stars in place of daylight, all built from tools originally designed for sunsets.
Before - Image by Lis Warren
Click to Enlarge
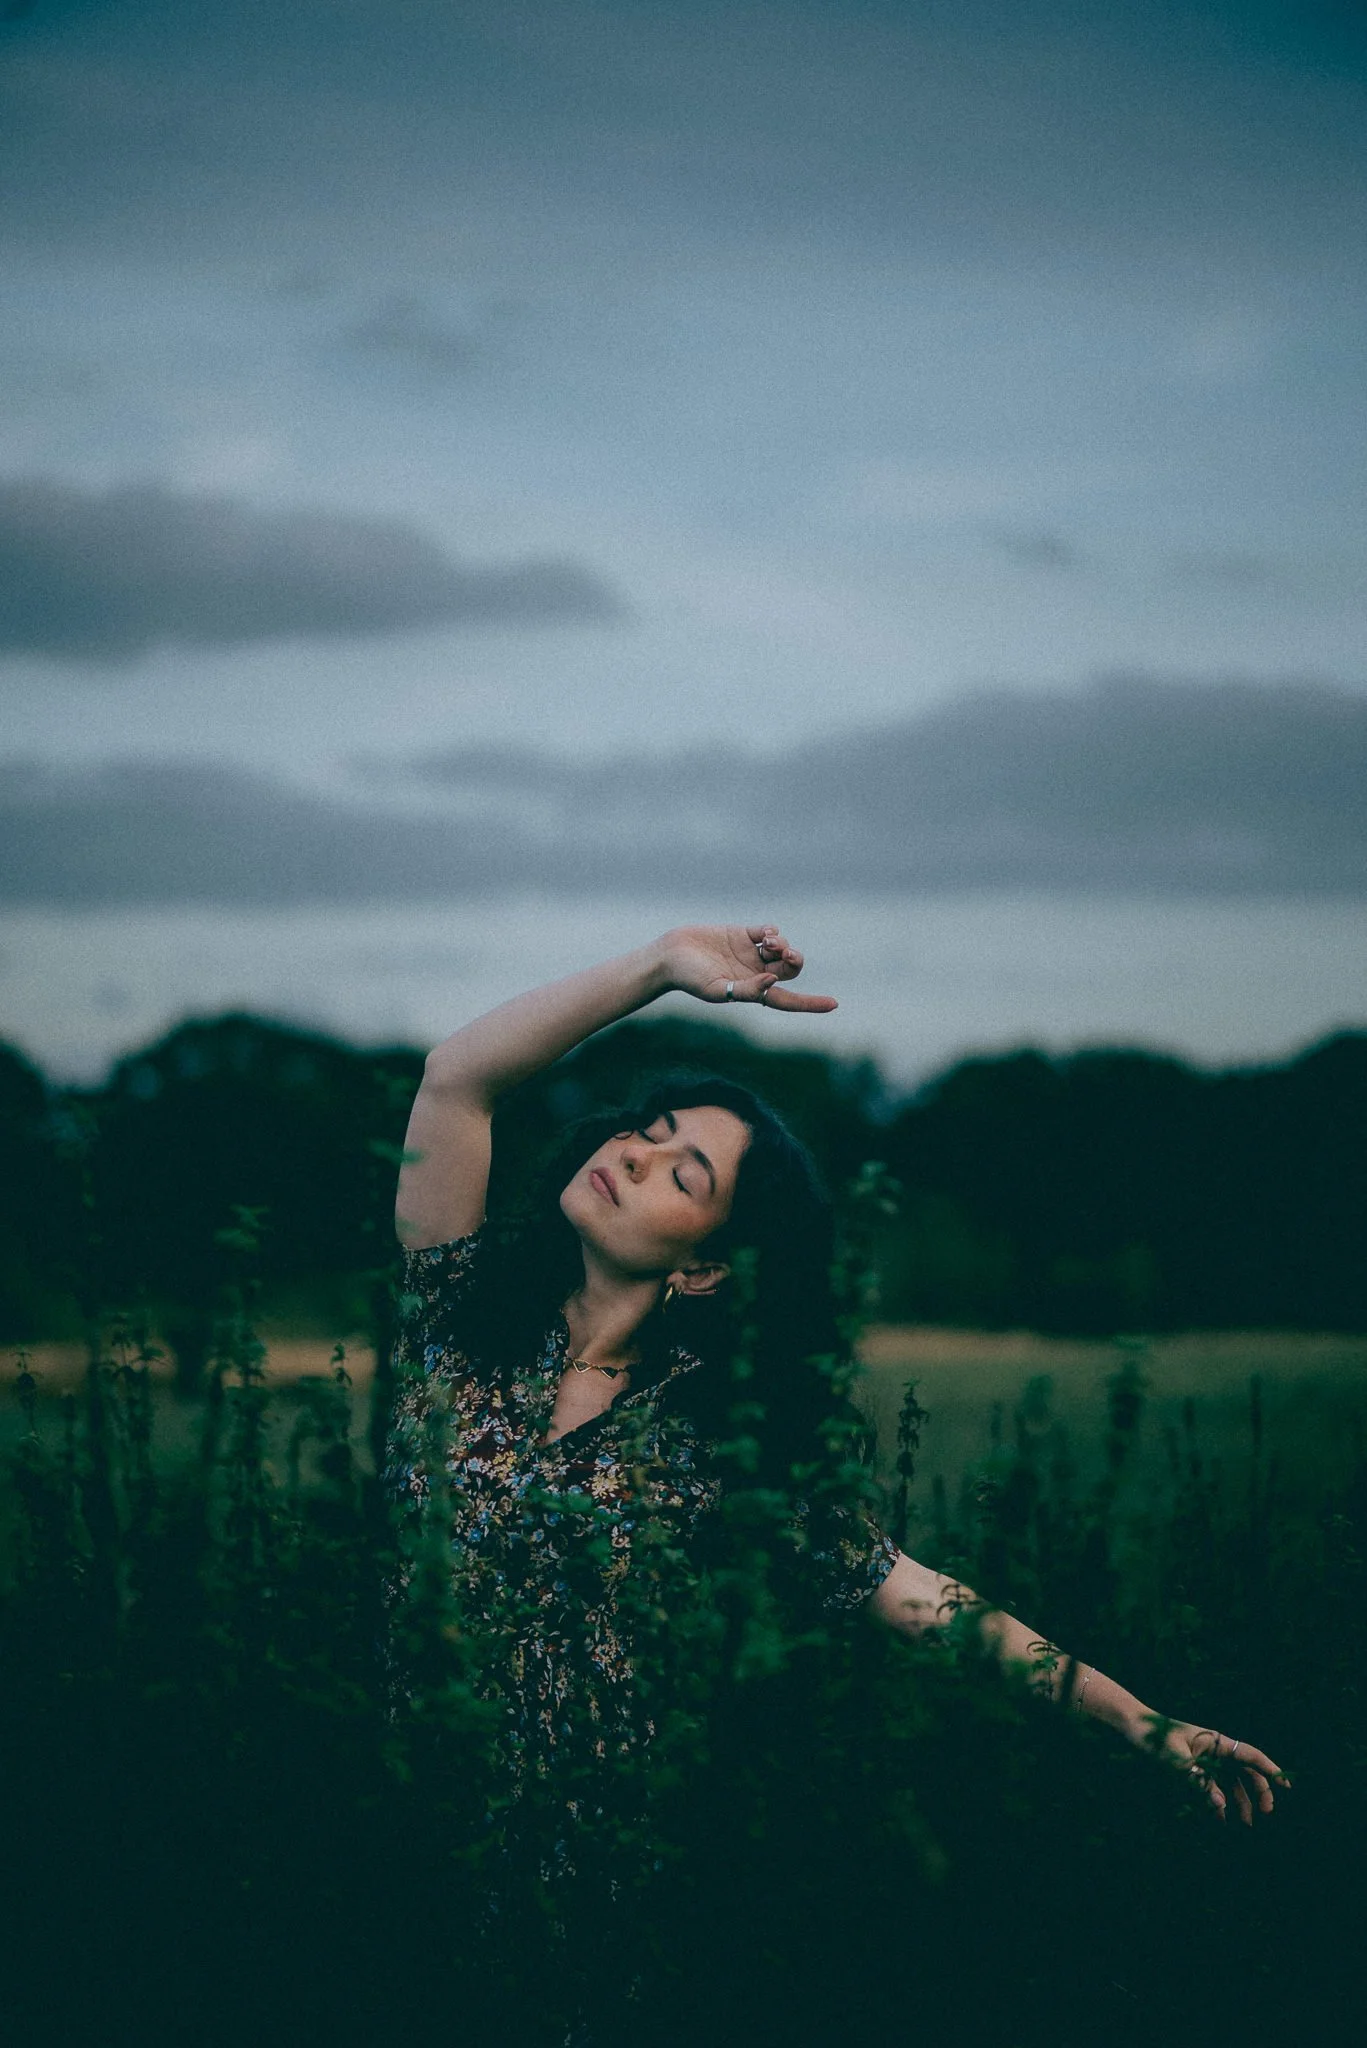
Base Edit - Image by Lis Warren
Edited with Quest 61 Ombra and Polar Twilight from Quest 43 Llŷr
Click to Enlarge
Final Edit - Image by Lis Warren
Edited with Quest 61 Ombra and Polar Twilight from Quest 43 Llŷr, plus tools from Quest Tools 09 - Sunset Enhancer and Quest 39 Driftwood
Click to Enlarge
The sky sets the tone for an entire image, and Lightroom's Sky Selection Mask gives you the precision to shape that tone without disturbing anything else in the frame. Whether you're reviving a lackluster sunset, adding weight and mood to an overcast day, recovering lost detail, or dialing back a sky that's grabbing too much attention, there's a tool built for the job. Once you get comfortable moving between these options, editing the sky stops feeling like damage control and starts becoming one of the most creative parts of your workflow.