3 Tips for Editing Beach Photos
Image by Valeriya Kulaeva
Edited with Quest 39 Driftwood, Subject Sharpen, Cloud Texture
One of the questions we get often over in our Archipelago Collective Facebook Group is about how to edit beach photos. Editing beach photos can be a challenge, with bright sunlight, reflective water, and vivid skies often requiring careful adjustments to get the perfect shot. Whether you're trying to capture the peaceful serenity of a calm shore or the vibrant energy of crashing waves, knowing how to enhance colors, manage exposure, and bring out the natural beauty of your scene is key.
So, since we’ve had a few successive releases that are PERFECT for editing beach photos, we decided to list some of our favorite tips and tricks to level up your editing game for photos taken on the beach!
Tip #1 - Enhance blues and aquas
Image by Flora Gibson
Edited with Quest 40 Del Mar, Cloud Texture
Use a preset that gives the blues and aqua tones of the water and sky an extra boost! This month’s preset, Quest 40 Del Mar, has gorgeous blue and aqua hues built right into the preset!
Or, to do this for any preset you want to use: adjust the HSL (Hue, Saturation, Luminance) sliders to bring out the rich blue tones of the sky and water. Increase the saturation of the blues and aquas, and adjust their luminance to make them pop while maintaining a natural look!
Image by Sam Morris
Edited with Quest 40 Del Mar
Tip #2 - Add golden warmth
Image by Kaya Amaranth
Edited with Quest 40 Del Mar
When most people think of the beach, they think of the warm, sunny days of summer or holiday vacations. Get a warm, nostalgic overtone with the Espresso presets included in Quest 40 Del Mar. Espresso 1, 2, and 3 are meant to layer on top of your base preset to give it a tea stained veneer.
Also, you can increase the temperature slider slightly to give your beach photos a warm, sunlit glow, especially if the image feels too cool. This will enhance the golden tones of the sand and give your photo a sun-kissed look.
Image by Valeriya Kulaeva
Edited with Quest 40 Del Mar
Image by Sam Morris
Edited with Quest 40 Del Mar
*Bonus Tip* - Use Sunset Enhancer to bring your evening beach photos to life!
Image by Sam Morris
Edited with Quest 40 Del Mar, Quest Tools 09 - Sunset Enhancer
If you’re photographing on a beach close to sunset or blue hour and want to amp up the colors in the sky, use Quest Tools 09 - Sunset Enhancer and bring that sky to life! This toolset is perfect for beach photos— the Cloud Texture and Sun tools are epic enhancements!
Image by Kaya Amaranth
Edited with Quest 40 Del Mar, Quest Tools 09 - Sunset Enhancer
Tip # 3 - Add masks to draw attention to your subject
Image by Beth McQueen
Edited with Quest 40 Del Mar and an added Background Mask with reduced exposure
Use Adobe’s AI-based awareness masks to mask out the subject, background, or sky in Lightroom and adjust the exposure or other effects to draw more attention to your subject! You can also use some of our pre-built masks in the Wedding Toolset to help with this!
Apply a linear gradient to the sky to balance the exposure and avoid overexposing it. This is particularly useful for bright skies, helping you bring back detail while keeping the focus on the beach and water.
Subtly darken the edges of the photo using a vignette/radial gradient effect to direct focus toward the center, where the main subject or the most important part of the image lies.
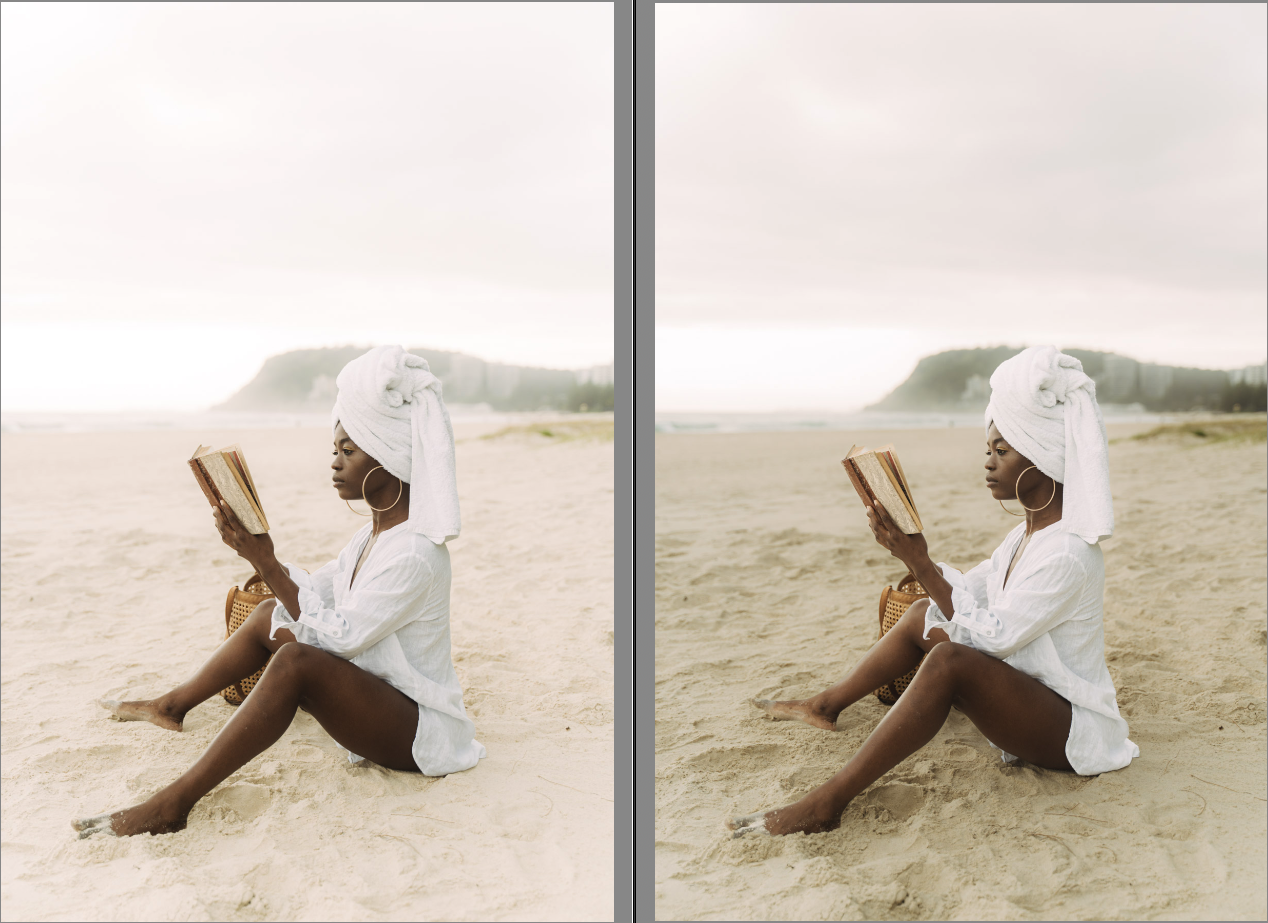
Image by Beth McQueen
Edited with Quest 40 Del Mar, Cloud Texture, and an upper linear gradient to bring down the exposure in the sky
*Bonus Tip* - Harsh Light Repair
Image by RamblinCowgirl
Edited with Quest 40 Del Mar, Harsh Light Repair
Beaches often have harsh shadows from direct sunlight, which can cause unwanted contrast in your beach scenes. Presets that already have a softer, lower contrast aesthetic like Quest 40 Del Mar are great places to start softening the harsh light, and you can use Harsh Light Repair from the Wedding Toolset to fix it even more!
Do you take beach photos often? What are your favorite tips when editing yours? Let us know in the comments!